
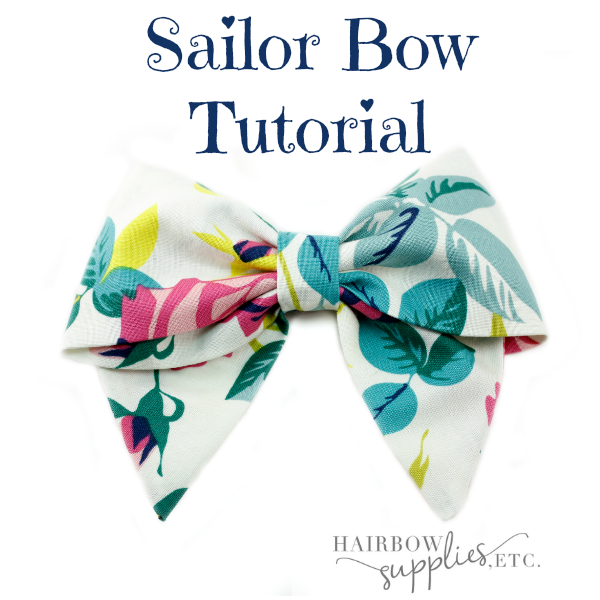
The sailor hair bow reminds me of sweet girls with their hair tied half back with the fabric bow in the back. Or a sweet prairie girl running in the meadows with long braids. This fabric bow tutorial is easy to make using fabric, a sewing machine and some thread! Join along with me to make a sailor hair bow! This darling hair bow instructional video will make a 5 inch hair bow. We’ll show you how to make a fabric bow with this easy template! You can make this hair bow with a barrette or alligator clip. It’s pretty versatile! If you need any help in my instructions, I have a video at the bottom visualizing how everything will be sewn together.

Get out the supplies you need:
Fabric (20 x 6 inch piece) and (4 x 2 inch piece)
Sewing Machine (Singer has always been my go-to machine)
Thread (Coats and Clark is my favorite)
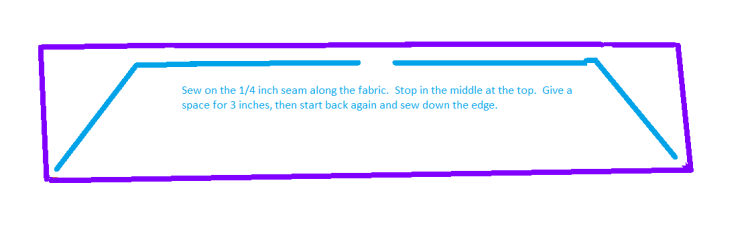
First, fold your fabric in half right sides together. Then sew your fabric up at a diagonal to the top. Then make a break for about 2 inches. Then start back again, sew down 1/4 of the length of the bow and then sew down diagonally to the edge. I made a cute little diagram on the Paint program for you. Remember Paint? I used to draw pictures on it all the time!
Take off the scissors and trim off the some of the excess, clip your corners. Leave about a 1/4 inch space of fabric outside your seams when you trim it.
Turn your fabric tube inside out. A great way to do this is by taking a pencil and run the pencil edge down the inside of the seam. This will help the seams to poke out just perfectly down the edge. Use the pencil to poke down on the corner to make the fabric tail’s end to be a really nice point. My husband’s grandma (who is turning 95 this month!) showed me that trick. I adore her to pieces!
So once you have your fabric turned all the way right side in, then you want to take your fabric and iron it. Then take some hot glue and use it to close up that 2 inch break that you made. This part will be well hidden once you make your bow.
Cross your left and right sides together. (See my cute diagram!)

And then gather your bow in the center. Once your bow is gathered, then you want to wrap a string around the gather. Then tie a knot in your string to make that center good and secure.
Once that part is done, then take your 4 x 2 inch piece of fabric and fold it into thirds. Then fold that over your center of your hair bow. Glue the edges together. Lastly take your alligator clip and hot glue it to the back and then you’re done!
So that’s it! See you next time when we do our next tutorial. Comment below if there’s another tutorial you’d like to see me do!

Thanks for the tutorial, it is so easy to follow.
Thanks so much!
Everything is very open with a really clear description of the challenges.
It was definitely informative. Your site is extremely helpful.
Thank you for sharing!
This is a great and simple tutorial. Thanks for creating it!