
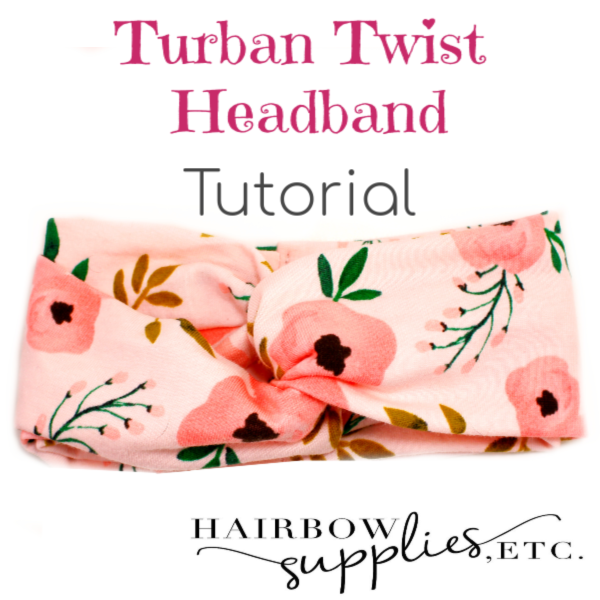
We’ve had the best week this week making headbands! We have continued our knit headband series, and this week we are making a twisted turban headband! I love this headband because when you stare at it, you’re thinking, now how did you get the twist in that headband? It’s like looking at one of those chain link metal puzzle games. Have you ever played with one of those?

And the whole time, you’re like, I know there’s a way to figure out how to undo this puzzle, but how in the world?! It usually takes me a few minutes to figure out the puzzle, and then I’m thinking, yeah that’s how it’s done. Just took me a few minutes to remember.
So, yeah, that’s what I think when I look at the twisted turban headband! Once you make the headband, and it’s finished, it’s so exciting to see the twist in the headband! Woot!
Let’s get down to how to make the sweet headband!
Supplies Needed:
Knit Fabric – 2 pieces 6 inches by 16 inches wide – JoANN stores has fantastic fabric. JOANN Fabric & Craft Stores
Safety Pins
Scissors
Sewing Machine – Singer is my favorite brand.
First you want to cut your fabric. Cutting knit fabric is kind of tricky. So to make this easier, you want to use rotary cutting scissors and a cutting mat. I found this the easiest way to avoid having my knit roll.
In order to know what size you need for your headband, you want to measure around the baby’s head and then SUBTRACT 1 inch. The size I am making is for a 6 month old, so I’m using a 16 inch long piece. For all of our headwrap tutorials, you want to use a 6 inch wide, and the length depends on the size of the child.
If you are making these headbands for a friend and need a chart (or your baby is napping and this is your only time to make a headband), see below for my size chart to see what typical sizes you need to make for your headband. Just remember to subtract an inch from whatever size you need the headband to be.

Once you have your fabric cut, then take your fabric and fold it lengthwise right sides together. And pin!

Be sure to do this for both pieces of fabric.
Then go to your sewing machine and then sew down the length of your tube
Once you have your tubes made (remember you’re making 2 identical pieces with your fabric). Then, turn them inside out.
After you have them turned, then line up the seams in the center of your tube. So, your fabric should look like the picture below.

Next, line your fabric pieces in an X shape. Make sure the seams are facing up – and that the seams are in the center.

Now, cross your fabric over one another to make the ends meet. Now your seams for the tubes should be touching each other – like inside. Make sense?

Then, take your ends and sandwich all 4 ends together.

This is where it gets a bit tricky. So, watch carefully, kay?
Okay so your ends are going to be labeled #1, #2, #3, and #4. That’s the most important part to remember.
Now, get your push pins handy. First go and find your middle two ends – #2 and #3. Pin those ends together at the top.

I drew a cute diagram for you to see where to pin.

With your first two ends – #1 and #2, pin those two together down towards the middle of the fabric.
The next part is a little crazy, so hang tight while we make this happen. Take your #4 piece (the last one) and bring that one over to the front right next to #1. Make sure your seams are facing OUT for this one.
Okay so pin piece #4 and #1 together at the top of your fabric.

That is the part where it makes your twist so make sure you have those specifically together.
You should now have 3 different places where you have pinned. The pieces that are pinned at the top – #2 and #3, and then #4 and #1, let’s take those ends and head on over to the sewing machine.
So, at your sewing machine, take #2 and #3 and sew those together on a 1/2 inch seam. Repeat this process with #4 and #1.
Take the ends that you just sewed (2/3 and 4/1) and then sandwich those ends together. Open up the ends a bit so you can have your fabric ends flush together. Pin this portion together.


Now, head back to your sewing machine and sew both ends together right down in the center of the stitch. In the quilting world, it’s called “stitching in the ditch”. This technique is used so that you can stitch and almost hide the stitch by sewing directly over it.

Once you have this part done, you can now take out your pins of all 3 sections including the part between #1 and #2.
You can take a look at your headband because – guess what? You finished!!! Great job! How does it feel to make such a pretty head wrap?! I absolutely love the softness of this knit fabric. It just makes you want to wear it all day!
The funniest thing about making this twisted turban headwrap, is the day after I made this headband, I went to the store and the girl at the checkout counter had the EXACT same headband that I just made! I was so excited about it! She got hers at the mall. But let me tell you, the one that we are making together today, it is MUCH better quality, thicker, and much softer! I am so proud of us! We made a beautiful headband!
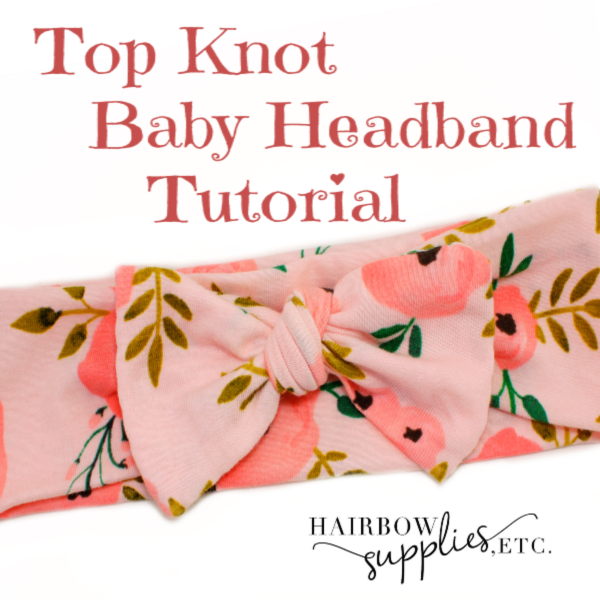
Check out the head wraps that we made last week – the top knot turban headband.
And the week before that we started out our series with the bow turban headband.

Hi! May I ask where you got the exact fabric from? I am interested in the pink flowers.