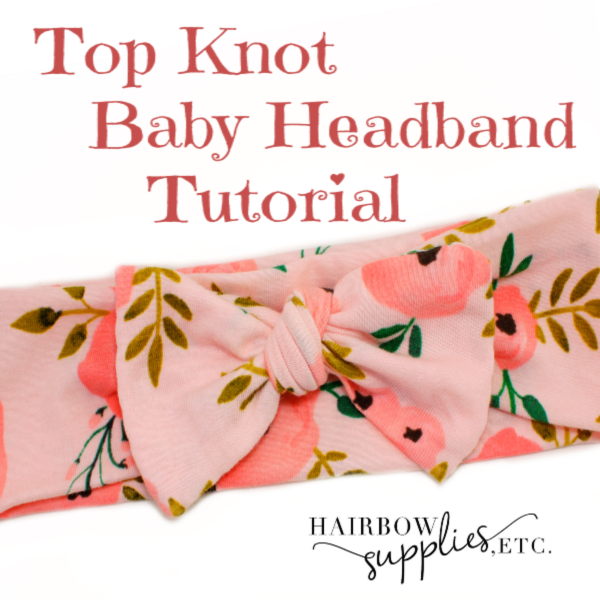
I just love the DIY top knot turban head wrap because it is the most simple sewing project! Of all the baby headband sewing tutorials, this is the easiest one! And for that, I am grateful! Finding an easy DIY hair accessory project is the best!
I made a few of top knot head wraps for my daughter and she was just squealy excited! It was picture day, the day I made the hot pink one. And she was like, I have to wear this to school today! I agree – the headband is absolutely precious! How could she not want to wear it, like right now!
So I made this in knit fabric in 2 different colors, a light pink and a fuchsia. The fuchsia one is stretchy, but almost had a T-shirt feel to the fabric. The light pink one stretched a lot and went back to it’s original size much easier. So just be careful when purchasing your knit fabrics to test out the “give” on your fabrics especially for baby head wraps so that when you wear them that they hold snug to your head best.

So let me show you how to make a baby top knot turban headband!
Get out your supplies:
Knit Fabric (see my chart below to see what size you need to cut your fabric)
Rotary Cutting Scissors, Cutting Board

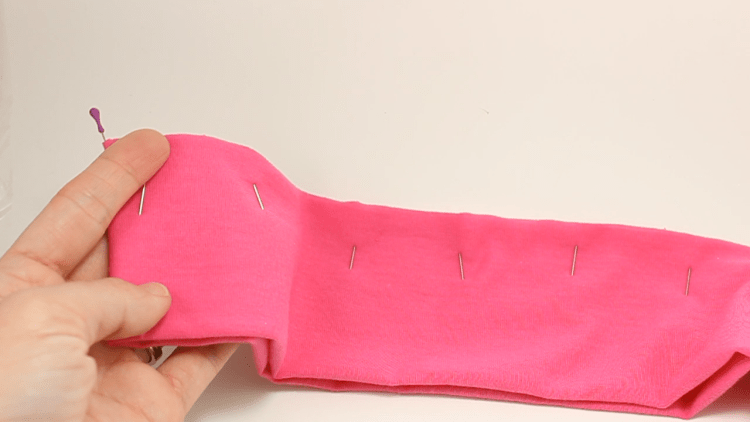
Okay, so take your fabric – I used a 6 inch by 27 inch piece of fabric for my headband. Take your headband and fold it in half longways. And pin down the sides.

Next, fold your fabric in half and take one of your straight pins and mark the center of your fabric.

After that, I want you to go to your sewing machine and sew down the length of your fabric. You want a 1/2 inch seam when you sew. Also, when you sew with knit fabric, be sure to sew a zigzag stitch. This helps the stitches to stay put and not to break when the fabric is stretched.

So I have included a little picture I drew below of where to sew. Sew from the left edge up to the corner and then to the right. Make a break of about 2 inches. And then start sewing again down your edges. The break is so that you can turn your fabric inside out.

Okay, now that your fabric is sewn, take your scissors and trim the corners. And then go ahead and turn your fabric inside out. Then, iron it to get all those wrinkles out!
Next, grab a tiny box or pillow or something tiny you can tie your knot around. This part is where I show you how to tie a baby head wrap knot.

Take your headband and center your fabric around your box. First you want to take your ends and tie the left side over the right side.

And pull your fabric ends up and tighten your fabric.

This next part is important so that your bow turns out correctly. Cross your top side over the bottom side.

And pull until you form a knot.
And that’s it! You made a lovely baby top knot turban headband! Tell me how yours turned out in the comments! What fabrics did you decide to use?
I love making top knot baby turban headbands! We’re making a series on how to top knot head wrap sewing tutorials this week! See my baby turban headband tutorial here…