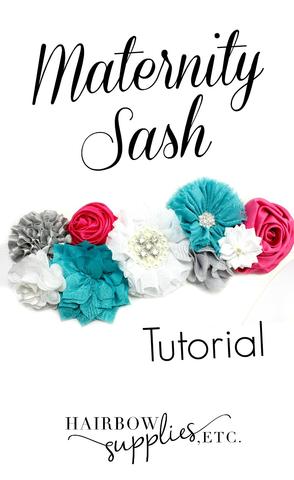
Have you seen a maternity photo shoot where the mother-to-be is wearing a DIY maternity sash? It’s such a wonderful way to celebrate the mother-to-be with a floral sash at her baby shower, or as a gift to use at her maternity photography session! It is a simple DIY project to make a maternity sash belt. You will simply need some ribbon and about 9 flowers along with a rhinestone button to add some bling to the accessory. The sash can be customized with using either lace elastic or ribbon depending on your style. Satin ribbon would be a gorgeous option!
The great part about making this DIY maternity sash is that it costs about $10 to make which is a huge savings on buying one in a shop! Plus you can customize the sash to exactly what colors you’d like them to be for the baby shower!

The supplies needed for this tutorial:
82 inches of 1-1/2 inch ribbon (about 2-1/2 yards)
9 coordinating flowers (we used 3 white flowers (chiffon pearl, dainty star, and petite puff from our shop) 2 teal flowers (lotus and ballerina chiffon), 2 fuchsia flowers(elegant rosette and sophia), and 2 gray flowers (ruffle silk mini and chiffon scalloped). When I chose the flowers, I made sure to choose a larger white center flower or one that has pearls or rhinestone buttons inside of it as the center piece. You could also add a glitter bow in place of one of the flowers.
So first, you want to get out your ribbon and measure the length that you want it to be. You want it to be long enough to wrap around a maternity bump as well as have room for a bow in the back with super long tails. I measured that you need about 2-1/2 yards of ribbon to make the sash.
First take your ribbon and seal the edges with a lighter. Then, take your ribbon and find the center. Take the center and make a slight crease. This will be the beginning of your sash. You’ll build your maternity sash on the center. Grab your largest and best flower (in this case it’s my Chiffon Pearl). Get your hot glue and put the flower right in the center of the ribbon. You will now build your sash around this main flower. You’ll be placing your flowers right on the ribbon and they will be a bit close to each other. As you do place your flowers on the ribbon, be sure and lift up the petals some to prevent any hot glue going on another flower. This way you will also ensure that you will be letting the flowers get closer to each other.
Start adding hot glue to each flower and then you will put each flower and coordinate the flowers by having every other color be shown. So, left to right I did white, silver, teal, fuchsia (The BIG white flower), then silver, teal, white and fuchsia on the end.
Another way you could do it is assemble your flowers together how you’d like them to look on the ribbon (don’t put the glue yet), and then take a picture of how it will all look. Then reassemble what you have in your mind on how you want it to look by then adding your hot glue.
When you’re adding the flowers, be sure to add them around and tuck them up and around each other so they fit snugly with each other.
Really it takes a few minutes to make this maternity sash! It took me less than 5 minutes to assemble the sash belt.
On the back of the sash, feel free to then add your felt circles to the back of the flowers and the ribbon to make for a nice seal on the back to fully secure your sash together.
Great job guys! You did it!
I’d love to hear in the comments below on how you made a maternity flower sash for a baby shower for a friend or neighbor and what colors you used!
Tune in next time when we have another DIY tutorial!


