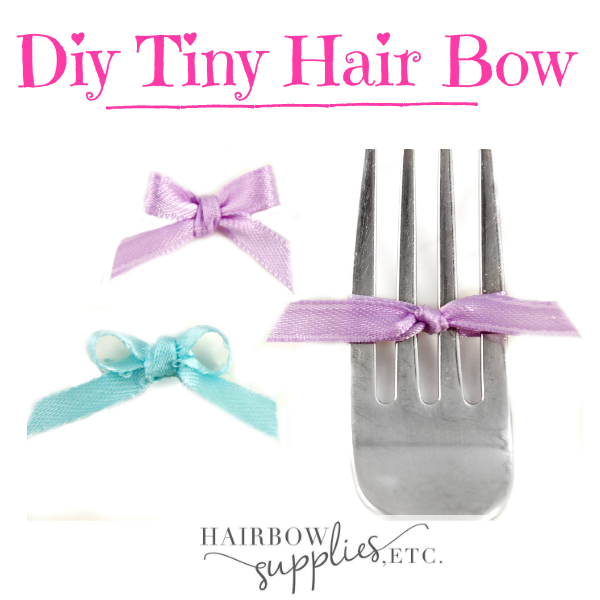
Have you ever needed a super tiny bow? Like a really, really tiny bow? I can think of using a tiny hair bow when you are scrapbooking, and putting a decorative hair bow on a picture or card. Or, when my little girl was a baby, she needed tiny bows in her hair and she didn’t have any hair on her head yet! If you need a tiny, tiny bow like 1 inch wide, this is perfect for you!
You can use satin ribbon for this project or grosgrain ribbon. I found that the satin ribbon made a tinier bow for what I needed. And the loops turned out really nicely. But the grosgrain worked well also. I used 3/8 inch ribbon as well for the bow, but it made about a 1-1/2 inch bow.
What you’ll need for this tutorial are:
1/4 inch satin ribbon (or grosgrain ribbon)
A fork (Seriously a fork – I’ll explain why in a minute)
First get your supplies out and then place your fork in your left hand. Then grab your ribbon and put the end laying over your fork. Just leave about 2 inches of the ribbon to the side of your fork. Then wrap your ribbon around the fork in a V shape tilted to the right. Scoot your ribbon up just a bit (maybe about 1/2 inch so that there’s a bit of space between the bottom of the tines of your fork and your ribbon.
Then, take your scissors and cut off the end of your ribbon that was pointed to the right. You’ll have about 5 inches hanging out to the right. Then take your ribbon that was pointed to the right, hold the end and bring it under the V ribbon (that was laying on the fork), and put it through the tines. Now wrap your ribbon over the V and up through the center tines of your fork. And bring the ribbon back down. Now you can see that your bow loops have formed.
Next, take your fork and lay it down on the table. This will help you to tie your bow more easily. So take your two ends that are left. Cross them together like you’re tying a knot. Then put one of the loops under the other and pull it through. Pull your knot tightly. It helps sometimes to tie it on an angle so that your ends end up straight. Now that your bow is tied nicely, you’re ready to slide the bow off the fork. So after you’ve taken the bow off the fork, then grab your scissors.
Cut your ends on an angle.
I like them to be on an angle that looks like this \ But however you do your angle is just preference.
Then take your fingertips and puff up your loop on your bow just slightly.
And that’s it! You’ve made a super cute, tiny bow! Your bow is ready for placement on a card, scrapbook, or even for an infant. The possibilities are endless!
I hope you enjoyed this tutorial! Let me know in the comments how you were able to use this bow for your crafts! Happy Crafting!!!