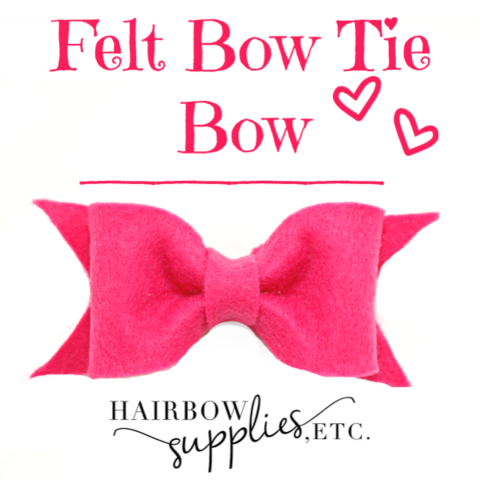
The felt bow tie bow is just adorable and simple to make! I really just love working with felt because it’s just a soft material to use! And I keep finding more and more beautiful projects to make with felt! Every time I go to the craft store, I really think the racks of felt have a larger selection every time I go! There were prints and glitter and solid colors of all sorts of kinds!
So, today, I’ll show you how to make a felt bow tie bow! This felt bow is so simple to make, you’ll have it done in minutes!
So, gather your supplies:
A Felt Sheet (I got mine at Hobby Lobby) – Felt cut into 3 pieces: 1-1/2″ by 6″ (for the bow), 1-1/2″ by 4″ (for the bow tails), and 1/2″ by 4″ (for the bow center)
First, take your longest piece, the 1-1/2″ by 6″ piece, and fold it in half and then crease it. Open it back up, and then put some hot glue in the center. Fold your right and left sides over to the center of your piece and let your hot glue cool a bit. That part will now be your back side of your bow. So, flip your bow over to the other side.
Now, pinch your bow together. At that pinch crease, put some hot glue down. Now, take your top of your bow and fold it back. Put some hot glue down, and bring that part to the center.
Repeat this one the other side. Find your crease, put some hot glue, and bring the middle down. Now, place your bow to the side and we’ll come back to it in a minute.
Go grab your second longest piece of felt, which should be your 1-1/2″ by 4″ piece of felt. Take your scissors out. Take your short ends of the rectangle, and crease them and cut them on an angle. You should do this on the other side of your rectangle. Now, pinch your center of this felt and place some hot glue in the center. Next, fold your edges of your bow back to the center. Put the hot glue on the back, and place your edges to the center of your bow.
Get more hot glue and put that in the center of your felt piece that we’ve made into bow tails. Put your hair bow on top of your bow tails felt piece and let the hot glue dry some.
Flip your bow/bow tails combo over to the back and add more hot glue. Then, add your alligator clip to the back. Be sure to keep your clip pinched open when you are adding the hot glue to the back.
While your hot glue is still warm, add the 1/2″ by 4″ piece to the back of your bow on the hot glue. Wrap the bow center around the front of your bow, and then add more hot glue to the back of your bow and finish wrapping your felt around your clip. Trim the excess felt off and you’re done!
Wow! That was fast! Great job! I bet you can make a dozen of these in an hour! I wonder if you use a rotary cutter if you could cut your felt faster? I need to try that and see!
See I told you I was crazy about making felt hair bows! I made a rolled felt flower tutorial recently. And here’s another felt hair bow video for you to watch…