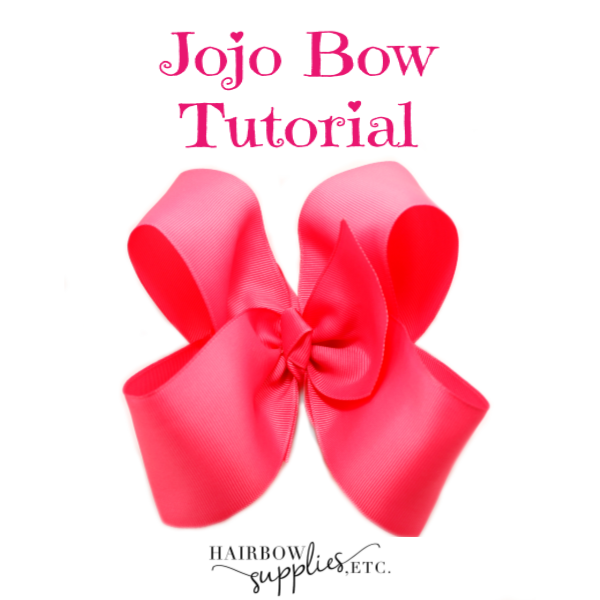
The Jojo hair bow is a super big, 5 inch hair bow seen in many stores to be worn by the cutest tween girls! I discovered the Jojo Siwa bow when on a shopping trip for my tween girl at Justice. Making your own DIY Jojo bow is easy and it saves you money! Today, we’ll show you how to make a Jojo bow using 2-1/4 inch grosgrain ribbon in this Jojo bow tutorial. I’ll show you my secrets on how to make your bow loops perfect!
Every time I make a hair bow I always have hair spray on hand. Hair spray is my best friend in bow making! My bow loops stay put exactly where I want them to go! As you practice making these hair bows, the better you’ll get at them. It really is an art, and has taken me a while to get good at making hair bows.

So here’s the supplies you need to get started:
40 inches of 2-1/4 inch ribbon
6 inches of 5/8 inch ribbon
First, take your 2-1/4 inch ribbon and hair spray the front and back of your ribbon. This will make your ribbon nice and stiff to keep your loops the way you want them to be. I let my ribbon sit out overnight, but you can use a hair dryer in a hurry to dry the hair spray. Once your loops are good and dry, you can go to the next step.
Next, take your ribbon ends, and flip one side around to the back. Put the 2 ends together and cut them on an angle. Now, flip the other side of your ribbon back to the original side. So now your ribbon should be folded in half. Make sure to seal the edges of your ribbon with a lighter. Take out your measuring tape. Now, fold your ribbon tails down to 3 inches down. Make a crease on those edges. Fold your ribbon in half again and crease the edges. Fold your ribbon one more time and crease the edges.
Unfold all of your ribbon and you will have creases exactly where your will be making your hair bow. Take your end of your ribbon and you will make your first loop. Fold y our ribbon in to the left at an angle and meet at the first crease. Now fold your ribbon in on the right and make your second loop. Make sure those two loops are matching. Now bring up your next crease and tuck it under the ribbon. Lastly, bring up your last crease and fold this down to the left. Your bow should have 4 loops now.
Now, get out your needle and thread. Put your 2 ends of your thread through the eye of the needle. This will leave a loop at the bottom of your thread. This is exactly what you need so you don’t have to tie a knot at the end of your bow.
Put your needle through the center of your bow and back up through the bow stopping before the loop comes out of the ribbon. Now put your needle through the loop and pull tight. Now, wrap your thread around the center of the bow 3 to 4 times. And then start pulling tight to make the gathers of the center of your bow. The double looped thread will help here in making your hair bow so that you can be sure the thread doesn’t break.
Flip your bow around to the back and secure off your thread by going in and out of the ribbon a few times. Get your scissors and cut the thread.
Now your bow should look nice and pretty! Okay, now get your 5/8 inch ribbon and tie a knot in your ribbon. Put some hot glue in the center of your bow, and put the center knot over this glue. Flip your bow around to the back, and hot glue your alligator clip to the back of your bow. Now bring your ribbon from your 5/8 inch knot to the back. Pinch open your alligator clip and put some hot glue down. Now put your 5/8 inch ribbon over the hot glue on top of the clip. Do the same for the other side of your 5/8 inch ribbon . As you add your 5/8 ribbon, trim it a bit to fit over your clip. And then seal the edges with a lighter.
Okay, so let’s go back to the front of the bow. Take out your hair spray and spray the loops on the top. I do 2 loops at a time. Pull the loops north and south to set them and make them look pretty. Hold onto your loops, and get out your hair dryer and dry the loops until they are set in place. Repeat this step again with the other side of your bow. There! Your loops should be all set where you placed them!
And that’s it! Your Jojo bow is now complete! In no time you’ll have a variety of hair bows to use! Experiment with a variety of colors and patterns! Or, even put different bow centers in the center of your bow to change it up a bit! Have fun!