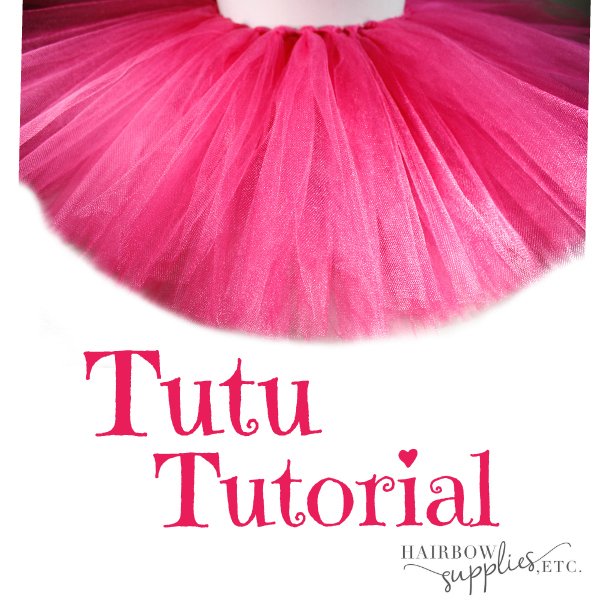
We’re going to show you how to make a super fluffy tutu skirt! I love that this a no sew tutorial! There’s nothing better than a layered tutu that’s super full! I’ll never forget how adorable my daughter was for her 2nd Halloween in her pretty, pretty pink princess tutu costume! We used a crochet headband in this DIY layered tutu with elastic which is perfect to use to add multiple layers to your tutu. The fuller, the better in my opinion! I mean – let’s get that tutu skirt to stick straight out full tutu. Like a ballerina, you know?!
Let’s get down to business. First you need to figure out – how big of a tutu do you want? How old is your little baby girl or big girl you’re making this for? What size and length do you need?
I made this super cute chart to help you figure out all those facts…

Okay, now that you know what size you’re making, get your supplies together. Today, I made a tutu to fit a 2 year old, so I got 25 yards of tulle.
Supplies Needed:
- Tulle (see chart above for amount)
- Crochet Headband
- Scissors
- Cardboard
- Tutu making stand (YES – I used a lampshade 🙂 This cracks me up – but it really works! You can use anything in a cylinder shape like oatmeal canister, protein powder canister, large coffee can, etc.
Cardboard: First you want to cut your cardboard piece into the size you need. It will be 6 inches wide, and the length will be HALF of what your strip length will be. (check the tutu size chart for your strip length). I made my cardboard piece 10 inches x 6 inches wide. The 10 inch long piece will make 20 inch long strips for my tutu. Does that make sense?
Tulle: Next, open up your tulle package and get your roll ready. Take your tulle and wrap it around your cardboard. What I did is had a table and I launched my tulle spool off the table and then started flipping my cardboard around to wrap the tulle evenly around my cardboard piece.
After you have all 25 (or more yards depending on size) yards wrapped around your cardboard, get out your scissors and cut ONE end of the tulle. This will make 20 inch strips for your tutu.
Tutu: Okay ladies – get out a stand to make your tutu. You’ll want a cylinder shape such as oatmeal canister, coffee can, or even better… a lampshade! Put your crochet headband around the lampshade and have it at a comfortable table you can work at.
Take your tulle strip and fold it in half. Then at the bottom of your crochet headband, start at the first square puff and put the tulle ends through the hole. Pull your tulle up through the hole. Once you get to the bottom, then open up the bottom and find the hole of your tulle, and bring the tulle through the loop and pull it down. Grab the ends of your tulle and pull on the ends and make that knot nice and secure.

That’s your first strip! Continue around your headband and make that first row. Once you get to the second row, start back again on the puffy square and repeat the process again of putting the strip through the hole, pull it through the loop, and pull down. You’ll repeat this across every square in the next layer. There are 5 layers you will be using on this tutu.
As you make your tutu, you can keep your tulle straight and organized by putting an elastic band around the ends of your tutu (only around one time, not doubling the elastic).
When you get to the end of making your tutu, grab your scissors. You’ll then trim the ends of your tutu. It’s kinda like cutting hair. Go through each section and make sure each end is as straight as possible.
And that’s it! It’s super easy to make a tutu! You’ll have your girl ready for her photo shoot looking like a darling princess! I love that the crochet headband makes it easy to make 5 layers in this tutu! I added the tutu tutorial on YouTube for you to watch to see any more details that might be easier to see. I love how fluffy and full this tutu turned out. It’s the perfect tutu for any occasion!